Table of Contents
Troubleshooting
1. General guidelines
1.1. Submitting support requests
- All support requests should be emailed to support@boyum-it.com or you can use our webform in our Help Center (login required). Replies to your requests will be delivered back to you by email.
- Please note that all communication should be done in English.
- Please include customer’s name and installation number for every ticket you open.
How to search for Help?
- To access the Help Center go to https://support.boyum-it.com/hc/en-us.
- In the Help Center, once you are logged in, you can view and manage all your tickets.
1.2. What to include when submitting a support call to Produmex?
- The error message and a description of the problem
- Detailed steps to reproduce the problem
- A database where it can be reproduced in
- The Produmex log files
- Produmex Service Broker: The log files can be found in the
%ProgramData%\Boyum IT\Service Brokerfolder (for pre-2023.06 versions it is C:\ProgramData\BX\BX Service Broker\Logs</color>) - Produmex Scan client log files can be found in the
%ProgramData%\Boyum IT\Service Brokerfolder (for pre-2023.06 version it is C:\ProgramData\BX\BX Service Broker\Logs) - Produmex Scan add-on: If you cannot open the log file from the error message, the log files can be found in the
%ProgramData%\Boyum IT\Produmex Scanfolder (for pre-2023.06 versions it is %AppData%\BX\Logs)
- SAP Business One version and PL version
- PMX version
- HANA Server or SQL Server version
- When did it happen first?
- How many clients have this problem? (only one or more?)
- Was there any upgrade recently?
- Was there any major change in the system recently?

1.3. Where to upload files when requested to do so?
There's an FTP server at your disposal, where you can upload files to Produmex. This way you can send large files (log files, database backups…) that don't fit in an e-mail.
The FTP access for upload is write-only, which means that you can upload any file, but you cannot download anything from that folder (not even the files you uploaded!). Only Produmex staff is able to retrieve uploaded files.
The credentials are the following:
- Host: ftp.produmex.name
- User name: upload
- Password: Avaya789
After having uploaded a file to the FTP server, please inform the Produmex staff that the upload has completed, including the file name and the support ticket reference, if any.
1.4. Error Messages on Scanners
- SBO Error Messages - Produmex scanners will display SBO error messages, so make sure to read the error message and determine if it is an SBO error or a Produmex error. If it’s an SBO error message, please Google it and use your current process for solving SBO errors before reporting to Produmex.
- Produmex Error Messages – In most cases the Produmex error message will give you an indication of what the problem is to make it easier to solve like any other SBO error message.
1.5. How to enable extra logging?
If you want to enable extra logging for debugging purposes, you can enable it in the following ways:
1.5.1. Produmex Service Broker
You can enable extra logging on the service configuration screen. Set the Debug writeline log? setting to ‘True’. Restart Produmex Service Broker.
The log file is located: C:\ProgramData\BX\BX Service Broker\Logs

It is recommended to disable this setting after the issue is discovered because it can create large log files.
1.5.2. Produmex Scan Client
You can enable extra logging on the Produmex Scan General tab of Produmex Scan settings. Add * to the Diagnostic Client Log settings field. Please note: The log file is sent after the user logged out.

The log file is located: C:\ProgramData\BX\BX Service Broker\Logs
1.5.3. Produmex Scan Add-On
You can enable extra logging on the Logs tab of Produmex Scan Settings. Set the Logging Level to ‘Debug (everything)’.
The log file is located: %AppData%\BX\Logs
1.6. How to check currently running processes
You can check the currently running processes on the webpages of the Service Broker:
Admin tasks
http://<IP>:<PORT>/api/Admin_tasks
where the IP is the IP address and the PORT is the port number.
Admin pools
http://<IP>:<PORT>/api/Admin_pools
where the IP is the IP address and the PORT is the port number.
2. Installation Issues
2.1. Failed installation
2.2. No backup detected
2.3. Wrong digital signature for Add-on installer
2.4. Connection to the company failed on HANA
2.5. Registration of eXontrol COM components
3. License Issues
3.1. No terminal license available
User/terminal is over the maximum Total number of terminal licenses concurrent connections: user=EmployeeNo. terminal= ClientAddress/ClientDeviceID company= Company

The current status of the license usage can be seen on a webpage of the Service Broker:
http://<IP>:<PORT>/api/admin_accesstokens
where the IP is the IP address and the PORT is the port number.
3.2. No Add-on license
3.3. SCAN subscription license issue
Issue
Error:
User/terminal is over the maximum 1 concurrent connection
Solution
Customers with subscritpion licenses must restart Service Broker at least once every 28 days to refresh the license to avoid this connection error. When the Service Broker restarts it always checks the portal for a new license.
Note: It is recommended to schedule a task in Windows Task Sceduler to run a weekly restart for Service Broker.
4. Produmex Service Broker
4.1. Service Broker cannot be started
Check the BXServiceBroker log file for more information. The log file is located: C:\ProgramData\BX\BX Service Broker\Logs
You can also open the log file by clicking on the ‘View log…’ icon on the Produmex Service Manager.

4.1.1. Module load error
ERROR Cannot start: System.Exception: BXMobileWH9WebAPI init fail: Module load error.
Solution
1. Check the version numbers. The version number of the Server Module, the Client and the SAP Add-on should be the same.
- The version number of the Server module can be checked on the ProdumexServiceBroker service configuration screen of the Service Broker
- The version number of the Client can be checked on the LoginScreen
- The version number of the SAP Add-On can be checked on the Add-On Management form
2. Check the DI API installation. For a 32 bit SAP DI an 32 bit Server Broker, for an 64 bit SAP DI an 64 bit Server Broker should be installed.
4.1.2. Connection to company failed
Connection to company failed: -8037 Failed to connect or logon to SLD, please check connection parameters and configure file
1. Remove and add the database again on the Setup Companies window of the Service Manager, then restart the Service Broker.
For more information about adding a database please see: Add new database
2. On HANA: Check the database server configuration on the Database connection screen of the ServiceBroker. It has to be in the exact same format as it was defined during the SAP DI installation. You can check it in the b1-local-machine.xml file. The file is located: C:\Program Files (x86)\SAP\SAP Business One DI API\Conf\
You can modify the connection data on the Setup Companies window of the Produmex Service Manager. For more information please see: Setup/Modify Connection data to the SAP company

4.1.3. Other
Check whether the add-on was started on the database. The add-on may contain changes and a database upgrade might be required.
4.2. Connection could not be established to the Service Broker
Issue
When starting the Produmex Scan application, the following error message is displayed:
No connection could be made because the target machine actively refused it.

When starting the Produmex PDC application, the following error message is displayed:
Connection could not be established to the Service Broker. Either it is not running or the application is not configured. Please run the configuration tool and/or check if the Service Broker has been started.

Solution
This document describes how to identify typical causes for this issue. It is possible it possible that your issue may be resolved by checking the listed steps.
4.2.1. Produmex Service Broker is not running
Check whether Produmex Service Broker is running or not. The connection cannot be established if the Service Broker is not running.

4.2.2. Produmex server component is not installed
Check whether the Produmex server component is installed for the Service Broker. The installed server modules are listed on the Produmex Service Broker tab of the ProdumexServiceBroker service configuration window.

If not, the following error message is displayed:

4.2.3. Check the Service Broker log file
If there are no error messages when starting up the Produmex Service Broker, check the log file of the Service Broker for more information. Please see: 4.1. Service Broker cannot be started
4.2.4. Incorrect IP address or port number
Run Configure Produmex Scan and check whether the correct IP address/server name and port number was added as the Server URL.

4.2.5. Firewall block
Check the firewall settings on the server. Make sure that both TCP and UDP connections are allowed to the port number of the Service Broker for the following services:
- BxServiceBroker.Service.exe
- BxServiceBroker.Console.exe

4.2.6. No valid certificate
When using https, make sure that you have a valid certificate that is bound to the port. For more information about configuring https and creating a self-signed certificate for Produmex Service Broker please see: Configure HTTPS for Produmex Service Broker
4.2.7. Network issues
In order to identify network issues, simulate the calls Produmex application makes. The testing protocol suggested below goes in increasing order of complexity, and identifying the specific step where tests fail can be a very valuable piece of information in order to find out the root cause of the connectivity issue.
4.2.7.1. Test access on the server
First simulate the calls on the server hosting Produmex Service Broker.
Produmex Service Broker Admin Page
Enter the following to the browser in order to access the Produmex Service Broker Admin Page: http://localhost:<PORT>/
Where the PORT is the port number.

Then try to connect to the Produmex Service Broker Admin Page with the following: http://<IP>:<PORT>/
Where the IP is the IP address of the hosting server and PORT is the port number. If the hosting server has multiple IP addresses, it is recommended to try the connection with all IP addresses.
Database access
To simulate the database query, add the following to the browser:
- Produmex Scan:
http://localhost:<PORT>/api/bxmobilelmsdatabases/ - Produmex PDC & Produmex Operator:
http://localhost:<PORT>/api/broker_databases/
Where the PORT is the port number.
Then replace localhost with the IP address and check whether the connection can be established or not. Enter the following to the browser:
- Produmex Scan:
http://<IP>:<PORT>/api/bxmobilelmsdatabases/ - Produmex PDC & Produmex Operator:
http://<IP>:<PORT>/api/broker_databases/
Where the IP is the IP address and the PORT is the port number. If the hosting server has multiple IP addresses, it is recommended to try the connection with all IP addresses.

If the connection cannot be established, it could mean that the Produmex Service Broker does not run or the server module is not installed.
If the connection can be established with localhost but not with the IP address of the server, it can mean:
- The IP address is not correct.
- The IP address is not accessible.
4.2.7.2. Test access on another computer
If you were able to connect to the Produmex Service Broker Admin Page and the databases with both the localhost and the IP address of the server on the server, test the connection from another computer that is on the same network as the device(s) where the Produmex application runs.
Produmex Service Broker Admin Page
To test the connection to the admin page, enter the following to a browser: http://<IP>:<PORT>/
Where the IP is the IP address of the server where the Produmex Service Broker runs and PORT is the port number. If the hosting server has multiple IP addresses, it is recommended to try the connection with all IP addresses.
Database access
To simulate the database query, add the following:
- Produmex Scan:
http://<IP>:<PORT>/api/bxmobilelmsdatabases/ - Produmex PDC & Produmex Operator:
http://<IP>:<PORT>/api/broker_databases/
Where the IP is the IP address and the PORT is the port number. If the hosting server has multiple IP addresses, it is recommended to try the connection with all IP addresses.
If the connection can be established on the server, but not on a different computer, then the issue is most likely that your network configuration, for example a firewall, is blocking the connection. We recommend that you contact your network administrator.
4.2.7.3. Test access on the device
If you were able to connect to the Admin Page on the server and on another computer, try to connect from the device.
Produmex Service Broker Admin Page
To test the connection to the admin page, follow the steps described here: 7.2.1. Produmex Service Broker Admin Page
Database access
To simulate the database query, follow the steps described here: 7.2.2. Database access
If the connection can be established on the server and on a different computer, but not on the device, check the network settings on the device.
4.2.7.4. Simulate other calls
To learn more about the required network configuration, you can simulate the other calls as well on the server, a different computer or on the device.
Calls, subsequent to the database query, require header authorization. These calls can be simulated with a help of a REST client.
Follow these steps to set the Authorization header data:
- Enter or select ‘Authorization’ as the Header name.
- Specify the following value:
<deviceID>@<companyName>\<user>:<password>
For example:- With login information:
0@TEST_SCAN\1:1234 - Without login information:
0@TEST_SCAN\:
- Encode the value into base64 with any Base64 encoder.
For example:- With login information:
MEBURVNUX1NDQU5cMToxMjM0 - Without login information:
MEBURVNUX1NDQU5cOg==
- Set the Header value to
Basic <base64text>
For example:- With login information:
Basic MEBURVNUX1NDQU5cMToxMjM0 - Without login information:
Basic MEBURVNUX1NDQU5cOg==

Produmex Service Broker logs the successful calls to the access log, which is located in C:\ProgramData\BX\BX Service Broker\Logs\. You can select any calls from the access log to simulate.
Example calls for Produmex Scan
Calls when the application starts
To check the startup configurations add http://<IP>:<PORT>/api/bxmobilelmscommon/ as the ‘Request URL’.
To check further configurations, add http://<IP>:<PORT>/api/bxmobilelmscommon/?dummy=1 as the ‘Request URL’.
To check Produmex Scan customizations, add http://<IP>:<PORT>/api/bxmobilelmscustomization/?sinceDate=0001-01-01&expandFileData=True as the ‘Request URL’.
Calls when the employee ID is added
To load the employee details, add http://<IP>:<PORT>/api/bxmobilelmsemployee/?pinCode=1 as the ‘Request URL’. Replace the pinCode value with the Pin Code or the employee ID of the employee you would like to check.
To get the printers set for a given employee, add http://<IP>:<PORT>/api/bxmobilelmsprinting/?employeeID=1 as the ‘Request URL’. Replace the employeeID with the employee ID of the given employee.
Call when the Login button is pressed
To test the login date, add http://<IP>:<PORT>/api/bxmobilelmsemployee/?employeeID=1&password=1234 as the ‘Request URL’. Replace the emplyoeeID with the employee ID of the given employee and the password with the password.
Call when the Logout button is pressed
To simulate the logout, add http://<IP>:<PORT>/api/bxmobilelmscommon/?dummyUser=dummy as the ‘Request URL’.
Example calls for Produmex PDC
Calls when the application starts
To check the startup configurations add http://<IP>:<PORT>/api/bxppsmobilepdccommon/ as the ‘Request URL’.
To check further configurations, add http://<IP>:<PORT>/api/bxppsmobilepdccommon/?dummy=1 as the ‘Request URL’.
To see the extended terminal configurations, add http://<IP>:<PORT>/api/bxppsmobilepdccommon/?employeeID=0&terminalID=1 as the ‘Request URL’.
To see the customizations, add http://<IP>:<PORT>/api/bxppsmobilepdccustomization/?sinceDate=0001-01-01&expandFileData=True as the ‘Request URL’.
Example calls for Produmex Operator
Calls when the application starts
To get admin info, add http://<IP>:<PORT>/api/bxmwcommon as the ‘Request URL’.
To check the configurations, add http://<IP>:<PORT>/api/bxmwcommon/?configuration=configuration as the ‘Request URL’.
To see the customizations, add http://<IP>:<PORT>/api/bxmwcustomization?sinceDate=0001-01-01&expandFileData=True as the ‘Request URL’.
5. Produmex Scan client
5.1. Produmex Scan client cannot connect to the server
Operation timeout
1. If a time out error message is displayed on the device, check the log file for more information. The log file is located: %ProgramData%\Boyum IT\Service Broker (for pre-2023.06 versions it is C:\ProgramData\BX\BX Service Broker\Logs)
2. If the log file does not contain the error message, check whether Produmex Service Broker is running or not. Open the webpage of the Service Broker on the server and on the device.
http://<IP>:<PORT>
The default port is 50231.
The login page of the Service Broker should appear.

- If the page can be opened only on the server, there is a firewall or a network issue.
- If the page can be opened both on the server and the device, maybe there is a performance issue in the environment. Turn on the client log: On the Produmex Scan General tab of Produmex Scan settings, add * to the Diagnostic Client Log settings field.

Restart Produmex Service Broker and reproduce the issue. Send the log files to Produmex support with a detailed description. The log file is located: %ProgramData%\Boyum IT\Service Broker (for pre-2023.06 versions it is C:\ProgramData\BX\BX Service Broker\Logs)
3. Check whether the server module was installed on the Produmex Service Broker tab of service configuration.

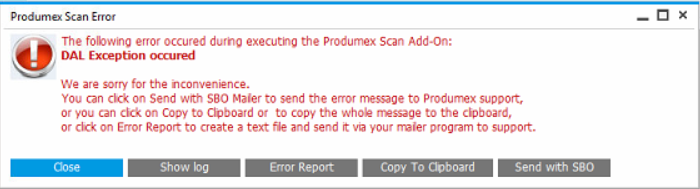
5.2. DAL Exception
Error DAL Exception occured
DAL Exception is usually an SQL error. In order to learn more about the issue, enable the debug log in Service Broker. On the service configuration screen set the Debug writeline log? setting to ‘True’. Restart Produmex Service Broker.
The log file is located: %ProgramData%\Boyum IT\Service Broker (for pre-2023.06 versions it is C:\ProgramData\BX\BX Service Broker\Logs)
It is recommended to disable this setting after the issue is discovered because it can create large log files.
6. Printing
6.1. The name of the printer is incorrectly configured
6.1.1. Check printer name
1. Make sure that the printer name in printer properties is the same as the Local Printer Name on the Printers Setup window. For more information about setting up the printers please see: Setting up the printers

6.1.2. Redirected printer
If the printer is redirected, try to install the printer directly on the server where the Service Broker runs.
6.2. The “Run as user” for Service Broker service is not allowed to use the printer
Enable printing permissions for the Run as user for Service Broker service.
Open the ‘Printer properties’ of the printer. On the Security tab select the ServiceBroker user and allow the following permissions:
- Print
- Manage the printer
- Manage documents

6.3. Label won’t be printed on a PDF printer
Issue
When printing with a virtual printer, the printer does not open the document after printing.
Solution
The document does not open after printing if the Service Broker runs as a service. If you want to use the PDF printer for a demo or in case you want to test your label, then you should start ProdumexServiceBroker in console mode.
If Produmex Service Broker runs as a service, stop it. Then run BxServiceBroker.Console.exe as an administrator. The file is located in C:\Program Files (x86)\Produmex\ServiceBroker

Configure the ProdumexServiceBroker with an administrator user other than system user.
Install a PDF printer that allows automatic saving. Configure an output location and automatic document numbering for the ServiceBroker user. Make sure that you configure the PDF printer in a way to show the document after generation.
Please note: We recommend to try multiple PDF printers because not every PDF printer is supported.
6.4. Default printing solution
1. Check whether the correct printer name is set.
- Check the printer name in the operating system. It is possible that the domain or computer name is necessary as well. Eg. Computer\Printer_name
- Check the printer settings on Administration > Setup > Inventory > Produmex Scan > Printers Setup. The Local Printer Name must be the same as the printer name in the operating system.
2. Configure the database connection Open the .rpt file in Crystal Reports designer. Print a preview document and change the connection to the right database. Save the report.
6.5. Custom printing solution
1. Check the custom printing settings.
- Check whether the report was imported into SBO.
- Check whether the report ID is correct in the user query.
- Check whether every report parameter is included in the user query.
- Check whether the report name is correct.
For more information please see: Custom printing
2. Open rpt file in Crystal Reprts designer. Print a preview document and change the connection to the right database. Save the report file. If you had to configure the database connection, import the report to SBO again. Make sure that you modify the report ID in the user query if needed.
3. Check if the report can be printed from SAP Business One.
6.6. Advanced printing configurations
With the advanced printing configurations printing issues caused by incorrect server/database connection settings in Crystal Reports can be solved.
To add the advanced printing configurations, run the following query on the database:
SQL
INSERT INTO "VALI002"."@BXPCONFIG" ("Code", "Name", "U_BXPDescr", "U_BXPValue", "U_BXPVType", "U_BXPRowVr")
VALUES('BXMPRAO', 'BXMPRAO', 'Crystal Reports connection parameters', '54', 1, NULL)
A new record will be inserted to the BXPCONFIG table. With this record the following parameters can be set:
- PRINTERADVANCEDOPTIONS_SETTABLELOGON = 1;
- PRINTERADVANCEDOPTIONS_SETTABLECONNECTION = 2;
- PRINTERADVANCEDOPTIONS_SETSUBREPORTS = 4;
- PRINTERADVANCEDOPTIONS_DISSOCIATESIZE = 8;
- PRINTERADVANCEDOPTIONS_USEPRINTERSETTINGS = 16;
- PRINTERADVANCEDOPTIONS_USECONNECTIONCLONE = 32;
- PRINTERADVANCEDOPTIONS_USESETTINGWITHNAME = 64;
The value of BXMPRAO is the sum of the value of the enabled parameters.
The default and recommended value is 54. It means that the Settable connection (2), the Set sub reports (4), the Use printer settings (16) and the Use connection clone (32) parameters are enabled (2+4+16+32=54) by default.
Do not change the default value. If the issue persists, please contact Produmex support.
Enabled settings:
- Settable connection (2): Creates a new connection structure with the actual parameters.
- Set sub reports (4): Applies the (1) and (2) setting to the sub reports as well.
- Use printer settings (16): Uses a non-standard access to printer settings.
- Use connection clone (32): Uses a clone of the connection structure.
Other settings that can be enabled:
- Settable log on (1): Resets the server/database connection to the actual in the tables of the existing structure. This setting is not taken into account if the Settable connection (2) setting is also enabled.
- Dissociate size (8): Enables the ‘Dissociate Formatting Page Size and Printer Paper Size’ option.
- Use setting with name (64): Uses both the standard and non-standard access to the printer settings.
Known cases:
* The error message 'Not supported within subreports'
Set the value to 1
6.7. Printing does not work on SBO 9.3 PL04
Starting from SBO 9.3 PL04, SBO includes a new SAP Crystal Reports runtime engine version 13.0.22 (technical version number 13.0.3500.0). In the past the SAP Crystal Reports runtime engine version 13.0.14 (technical version number 13.0.2000.0.) was used. Produmex Scan will support the new Crystal Reports version from version 18.2.
You can check the current SAP Crystal Reports version on Control Panel > All Control Panel Items > Programs and Features.

Workaround for Produmex Scan version 18.1 or older
In order to print with version 18.1 (or older) of Produmex Scan on SBO 9.3 PL04, make the following modifications:
1. Adjust the app config file of the Service Broker. Open the BxServiceBroker.Service.exe.config file from C:\Program Files (x86)\Produmex\ServiceBroker\ with a text editor. Insert the following code after the already existing “dependentAssembly” tags.
  <dependentAssembly>
    <assemblyIdentity name="CrystalDecisions.CrystalReports.Engine" publicKeyToken="692fbea5521e1304" culture="neutral"/>
    <bindingRedirect oldVersion="13.0.2000.0" newVersion="13.0.3500.0"/>
  </dependentAssembly>
  <dependentAssembly>
    <assemblyIdentity name="CrystalDecisions.ReportSource" publicKeyToken="692fbea5521e1304" culture="neutral"/>
    <bindingRedirect oldVersion="13.0.2000.0" newVersion="13.0.3500.0"/>
  </dependentAssembly>
  <dependentAssembly>
    <assemblyIdentity name="CrystalDecisions.Shared" publicKeyToken="692fbea5521e1304" culture="neutral"/>
    <bindingRedirect oldVersion="13.0.2000.0" newVersion="13.0.3500.0"/>
  </dependentAssembly>
    <dependentAssembly>
    <assemblyIdentity name="CrystalDecisions.Windows.Forms" publicKeyToken="692fbea5521e1304" culture="neutral"/>
    <bindingRedirect oldVersion="13.0.2000.0" newVersion="13.0.3500.0"/>
  </dependentAssembly>

7. Issues while Working with Produmex Scan
7.1. No blank serial number found
When scanning a serial number on the client, Produmex Scan displays an error message despite the fact that there is stock for the item in the inventory:
Current stock is too low for item <itemcode>. Stock: 0

The affected items are the serial numbered items managed with the On Release Only method and the possible reason behind the error message is that the system cannot find suitable ‘blank’ serial numbers to update.
Possible solution
Check if the Automatic Serial Number Creation on Receipt option is enabled on the Item Master Data screen. When it is not enabled, SAP B1 will not create ‘blank’ serial numbers during the reception. Therefore, there will be no blank serial number to update when creating inventory issue documents.
Create the serial numbers manually on the Serial Number Management - Complete screen.
7.2. Mobile picking data of pick lists cannot be synchronized
When synchronizing mobile picking data on the Pick List screen, SAP B1 may experience a discrepancy between the picked quantity and the open quantity on the base document and it displays an error message.
The cause of the discrepancy is that the SAP stock has been modified during the picking process.
Examples of SAP error messages resulting from the discrepancy are:
- Cannot add row without complete selection of batch/serial numbers.
- 1470000341 - Fully allocate item <itemcode> to bin locations in warehouse <whcode>. Fix stock allocations in SAP based on available quantities for all the lines of this Pick List.


Best practice
Review the picked items (picked quantity, bin location and batch quantity) and compare them to the open quantity of the base document. Adjust the quantities manually to resolve the discrepancy or if it is not possible, close the original pick list, create a new one and start the picking process again.
The following query can be used to list the picked items of a given pick list which is not closed. Make sure that you indicate the pick list number at the end of query.
select * from "@BXPLMSMOBPICK" as "P" LEFT JOIN "PKL1" on "P"."U_BXPPkLEn" = "PKL1"."AbsEntry" and "P"."U_BXPPkLLn" = "PKL1"."PickEntry" where "PKL1"."PickStatus" <> 'C' AND "PKL1"."AbsEntry" = ENTER YOUR PICK LIST NUMBER HERE
After running the query, open the Mobile Picking Data UDT (BXPLMSMOBPICK) via Tools > User Defined Windows and on the basis of the query results modify the picked quantity of the given pick list manually.
7.3. The stock cannot be allocated in Produmex Scan
Example: Error message while performing a stock transfer

Possible causes:
a) The stock is allocated for another transaction which has not been finished.
Solution: Finish the blocking transaction.
b) A transaction started in Produmex Scan must be finished in Produmex Scan. If it is finished in SAP B1, next time when you use the same stock in another transaction in Produmex Scan, the system displays the error message. The stock is allocated for the previous transaction and cannot be used for another transaction.
Solution: Cancel the blocking transaction in SAP B1.
- Navigate to Inventory > Inventory Transactions > Mobile Transactions > Search Mobile Transactions. Here you can find the pending transactions.
- Double-click on the transaction and the system opens the Mobile Transactions screen.
- Right-click on the Mobile Transactions screen and select Cancel.

7.4. Scan Error "POI Code is missing" in Produmex Scan
Important: In Argentinian localization where the POI field is mandatory for certain SBO Transactions during a scan an error message will pop up. POIs are NOT implemented for Stock Transfer in Produmex Scan. The POI field should have been filled beforehand in SAP B1.

More information about the extra fields for Argentin Customers:
Produmex Scan: Extra Fields for Argentinian Database
There is a possibility in SBO to generate the POI Codes automatically that is explained in Spanish Definición de puntos de emisión | SAP Help Portal